Articles are currently available in English.
Yoga
Downward Dog at the Wall: A Gentle 10-Minute Practice
By Sweat & Snack · 2026-11-03
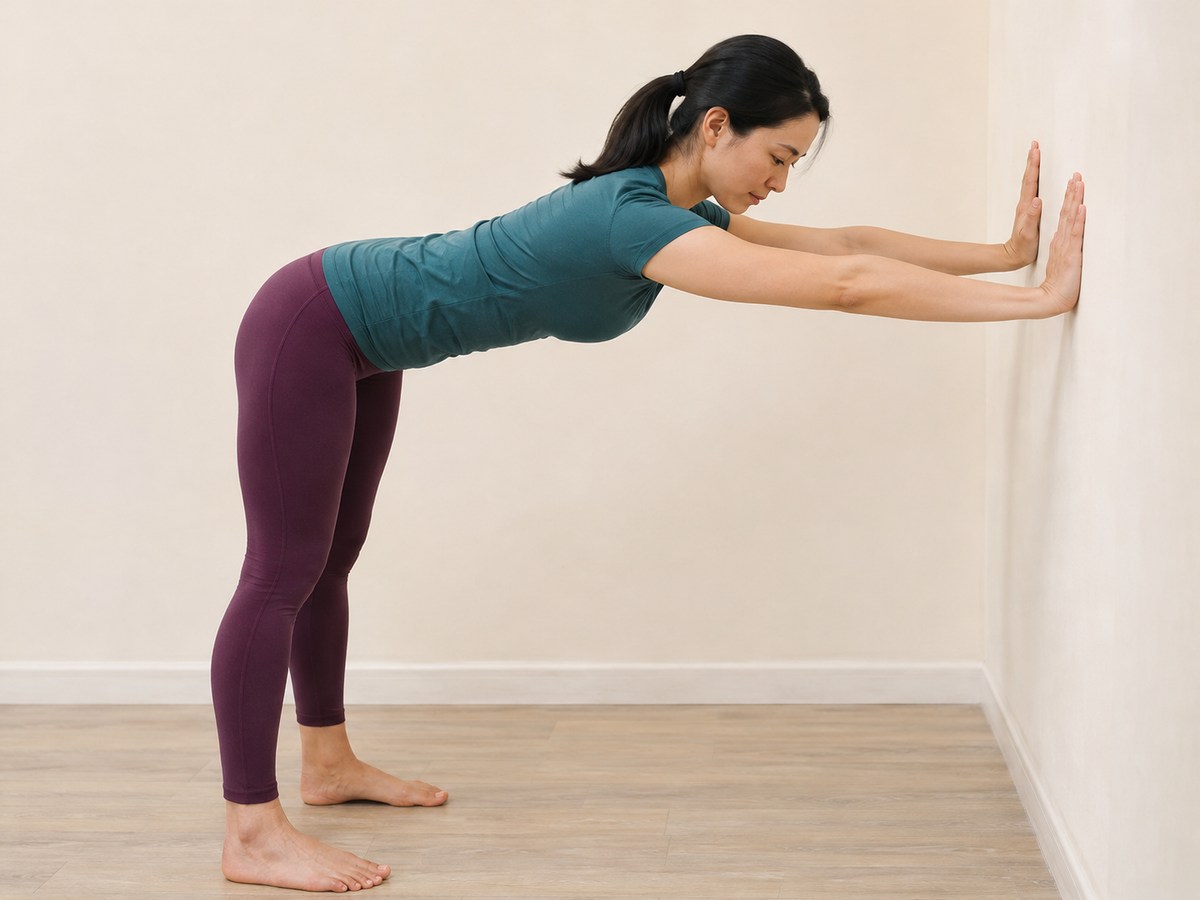
You do not have to move straight from standing to an inverted V on the floor to explore Downward Dog. A wall variation lets you practise the backward hip movement with your feet on the ground and hands higher up. The aim here is a comfortable entry and return, not a perfectly horizontal back.
This suggested ten-minute home session focuses on one pose variation. It includes checking the room, warming up, short attempts, standing pauses and a finish. It is not a treatment for pain or a promise to make the floor pose easy. Being able to use a wall does not make every shoulder, wrist or balance problem suitable for self-directed practice.
Choose the wall before the pose
Use a solid wall with a clean, dry area for both palms. Avoid glass, doors that can open, radiators, shelves, pictures and sockets in the working area. Clear enough space behind you for several small steps without contacting furniture. Your feet need a dry surface with reliable grip; do not put a loose rug or sliding towel underneath them.
Stand close enough to touch the wall without leaning. Check that both hands can rest comfortably at roughly shoulder height. Keep fingers spread and elbows soft rather than locked. If standing securely, reaching forward or putting any pressure through your hands is uncomfortable, skip the pose. A stable chair nearby can be used for a seated rest, but this practice does not use a chair as a load-bearing prop.
Learn a small entry and a calm exit
Cleveland Clinic's wall variation starts facing the wall with palms flat, then moves the feet back while hinging at the hips; the head stays in line with the back, with the gaze toward the floor. It describes brief 10–15-second holds. Our session below builds short attempts and generous standing pauses around that basic shape.
- Place both palms on the wall in front of you, about shoulder-width apart. Stand with feet comfortably hip-width, keeping the knees soft.
- Take one small step back with each foot. Move your hips backward and allow a modest forward hinge while your hands stay supported. Adjust hand height gradually if needed; do not slide suddenly downward.
- Stop at a small, comfortable angle. You do not need a right angle, straight knees or a deep stretch. Keep breathing normally and let your neck follow the line of your torso.
- To come out, take small steps toward the wall and slowly return upright. Bring the head up with the torso, then let your arms rest. Pause before deciding about another attempt.
Do not turn your head toward a video screen during the hinge. Read or watch the instructions while upright, then try the movement. If you cannot return smoothly or feel yourself hanging heavily through the shoulders, make the next attempt smaller or finish the practice.
A complete ten-minute clock
The times are an editorial practice suggestion, not a clinically tested dose. Start the timer before checking your setup. Extra rest always takes priority; do fewer attempts rather than rush to keep the schedule.
| Time | What to do |
|---|---|
| 0:00–1:00 | Check wall and floor, clear the step-back space and stand comfortably. |
| 1:00–3:00 | Warm up with easy walking in the cleared room, relaxed shoulder movements and gentle hand opening/closing. Keep the pace comfortable. |
| 3:00–4:00 | Rehearse hands on wall and one small step back, then return upright. Use the remaining time to rest and adjust hand height. |
| 4:00–7:00 | Use three one-minute blocks. In each block, allow 15 seconds to enter, up to 10 seconds in a comfortable shape, 15 seconds to return and 20 seconds upright with arms resting. Skip any attempt that does not feel right. |
| 7:00–8:00 | Stand or sit and rest. Decide whether another small attempt would be useful; there is no requirement to add one. |
| 8:00–9:00 | If comfortable, repeat one one-minute block with the same small range. Otherwise spend the minute resting. |
| 9:00–10:00 | Finish upright or seated, let the arms relax and note which hand height and step length felt manageable. |
Make the movement smaller before making it longer
Keep the hands higher and take fewer steps back for a more upright variation. Leave the knees slightly bent. These are options for reducing the reach, not instructions to push through discomfort. If the wall or floor is slippery, stop and fix the setup rather than grip harder.
Do not add long holds, repeated deep hinges or a floor transition simply because time remains. A useful note might be: “palms near shoulder height; two small steps back; returned smoothly.” Our transition guide covers planning the movement between positions, while the no-kneeling session offers a broader sequence. This article teaches the specific wall-hinge setup and exit.
When to stop or get individual guidance
Stop for pain, tingling, dizziness, unusual breathlessness or a feeling of instability. Seek appropriate help for concerning symptoms. If you have an injury, a medical condition, recent surgery or pregnancy-related questions, ask a qualified health professional whether this movement is suitable. A qualified yoga teacher can help you find a comfortable hand height and entry.
NCCIH's safety guidance stresses appropriate instruction and modifications for individual circumstances. A wall is a prop, not proof that a pose is safe for everyone. The photograph illustrates a fictional adult demonstrating one modest range; matching the model's angle is not the goal. For future routine-planning tools, join the Sweat & Snack waitlist.