Articles are currently available in English.
Exercise
Incline Push-Ups: When Should You Lower the Support?
By Sweat & Snack · 2026-10-29
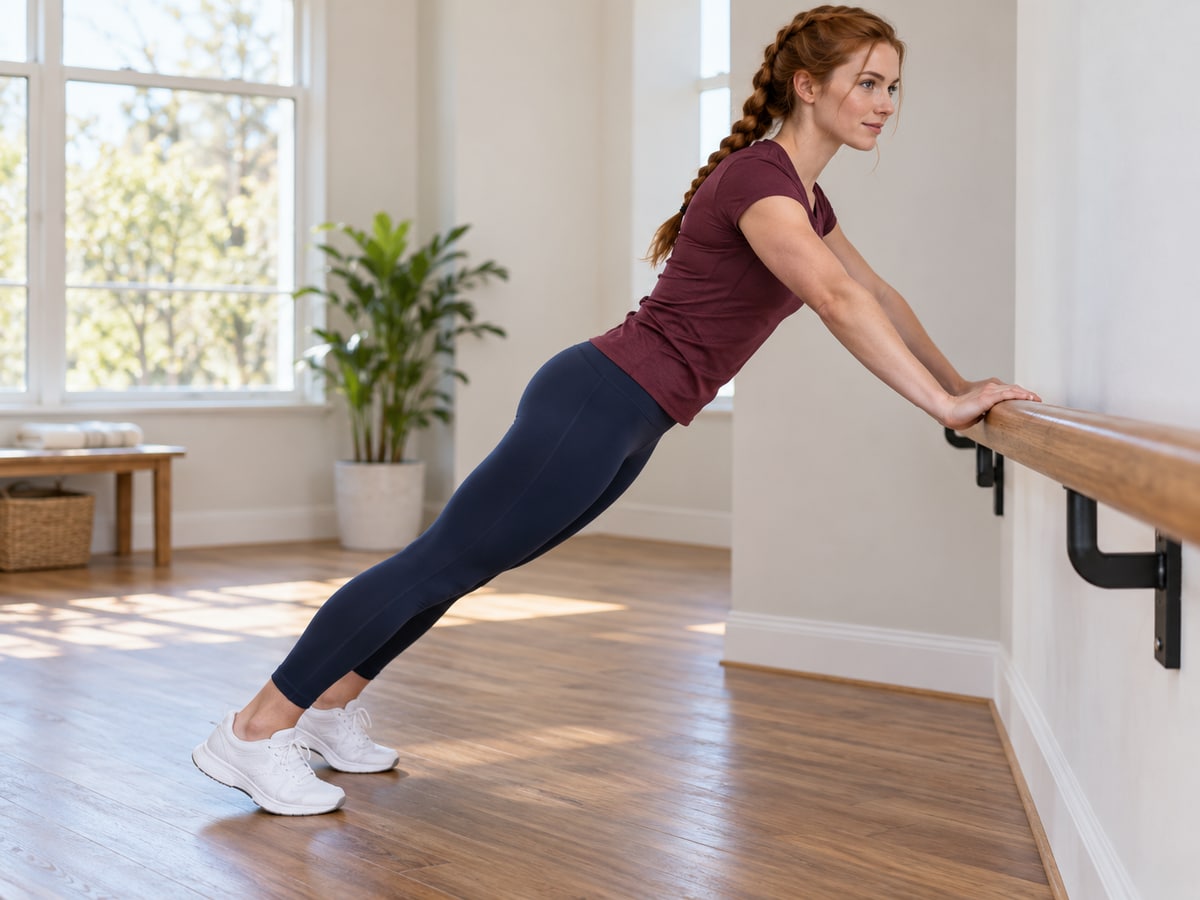
If wall push-ups feel familiar but a floor push-up still changes your technique, try thinking in support heights rather than a pass-or-fail jump. An incline push-up uses a secure raised hand support. The useful next step is a height where you can repeat a controlled movement, then record enough detail to compare another session.
This guide is for adults already practising push-ups who want a structured progression question. It is not a ten-minute full-body workout or a rehabilitation plan. Start with our wall push-up guide if the basic pushing movement is new. Here, the new task is choosing and reviewing an intermediate hand-support height.
Why hand height matters
The NASM incline push-up demonstration describes an elevated hand position as reducing the bodyweight load compared with a floor push-up. Lowering that support gradually makes the variation harder. This does not turn a measured bench height into a precise percentage of your bodyweight: body proportions, foot position and setup also matter.
Use height as a repeatable description of the exercise, not a strength score. Two people using the same rail may have different experiences. A lower support is an option for progression, not an obligation or evidence that somebody is fitter than somebody else.
Choose a support designed to stay put
Use a fixed exercise rail or a heavy, secure exercise bench appropriate for supporting your bodyweight. Ask gym staff or a qualified trainer to check unfamiliar equipment. A wall is the easier fallback. Do not stack books, stools or loose boxes to create intermediate heights, and do not use a wheeled chair, folding table, glass surface or furniture that slides or tips.
Clear space behind your feet and beside your body. Wear footwear that grips the dry floor and check that your palms will not slide. Remove loose rugs. Record the hand-contact height while standing, before beginning; do not try to hold a measuring tape during a repetition. Keep children, pets and passing people away from the movement area.
Keep the movement comparable
NASM describes hands slightly wider than the shoulders, a straight line through head and heels, and controlled elbow bending to bring the chest toward the support. Keep the head aligned with the trunk and avoid letting the hips sag. Use a comfortable controlled range taught by your trainer; forcing the chest to touch an edge is not the objective.
Practise the setup at an easier height first as part of your normal warm-up. Step back only as far as you can manage with secure feet and hands. Breathe normally rather than holding your breath to grind out a repetition. If the position is unclear, get coaching before making it harder.
A practical progression log
The following is a fictional example to discuss with a trainer, not a tested programme or a universal threshold. Suppose an existing plan uses two sets in a six-to-ten repetition range. Keep the support, hand placement, range and planned rest the same while recording what happened.
| Practice | Observed result | Next decision |
|---|---|---|
| A: fixed higher rail | 8 and 7 controlled repetitions | Repeat that setup; no automatic height change |
| B: same rail, later session | 10 and 10 with the planned technique | Review a small supported height change with a trainer |
| C: lower fixed rail | 4 controlled repetitions, then hips begin to sag | End the set and return to a suitable easier setup |
The example's numbers are organisational choices, not medical clearance or an optimal prescription. Reaching ten repetitions once does not prove that the next available height is appropriate. If a lower bench creates a large jump, stay with the higher support while discussing other programming options. Avoid repeatedly testing an unsuccessful variation within the same session.
Change one planned variable
Write the support identity and height, repetitions per set, rest and a short technique note. If you lower the hands, move the feet, shorten the range and reduce rest together, the results are hard to compare. Our workout-log guide explains the basic record; here, support height is the extra field that makes a bodyweight exercise repeatable.
Do not race the rest period to make progress seem faster. Begin the next set when you can reset comfortably according to your existing plan. See rest between sets at home for that separate readiness question. End the exercise if fatigue prevents the intended movement, even when the written target is unfinished.
What research supports, and what it does not
The 2026 ACSM resistance-training position stand supports individualising progression and includes bodyweight training within resistance exercise. It also finds that routinely reaching muscular failure is not required for the outcomes reviewed. Those findings support a gradual, goal-based discussion; they do not validate this particular rail-height log or predict when you will achieve a floor push-up.
There is no deadline here for leaving the wall or reaching the floor. Keep an appropriate incline as part of a broader programme if that fits your goal. This one pushing exercise does not cover every major muscle group or replace your wider activity plan.
When to stop and get help
Stop for pain, dizziness, unexpected breathlessness, numbness or unstable equipment. Do not train through symptoms to reach a repetition target. Seek appropriate medical advice for concerning or persistent symptoms; ask a qualified trainer about technique and equipment. People with injuries, recent surgery or a condition affecting exercise should follow their individual clinical guidance.
Sources checked 29 October 2026. The worked log and setup checklist are editorial suggestions. Images are AI-generated photographs of a fictional adult; they illustrate the setting and do not replace individual movement assessment.