Articles are currently available in English.
Yoga
Sphinx or Low Cobra? A 10-Minute Home Practice
By Sweat & Snack · 2026-10-30
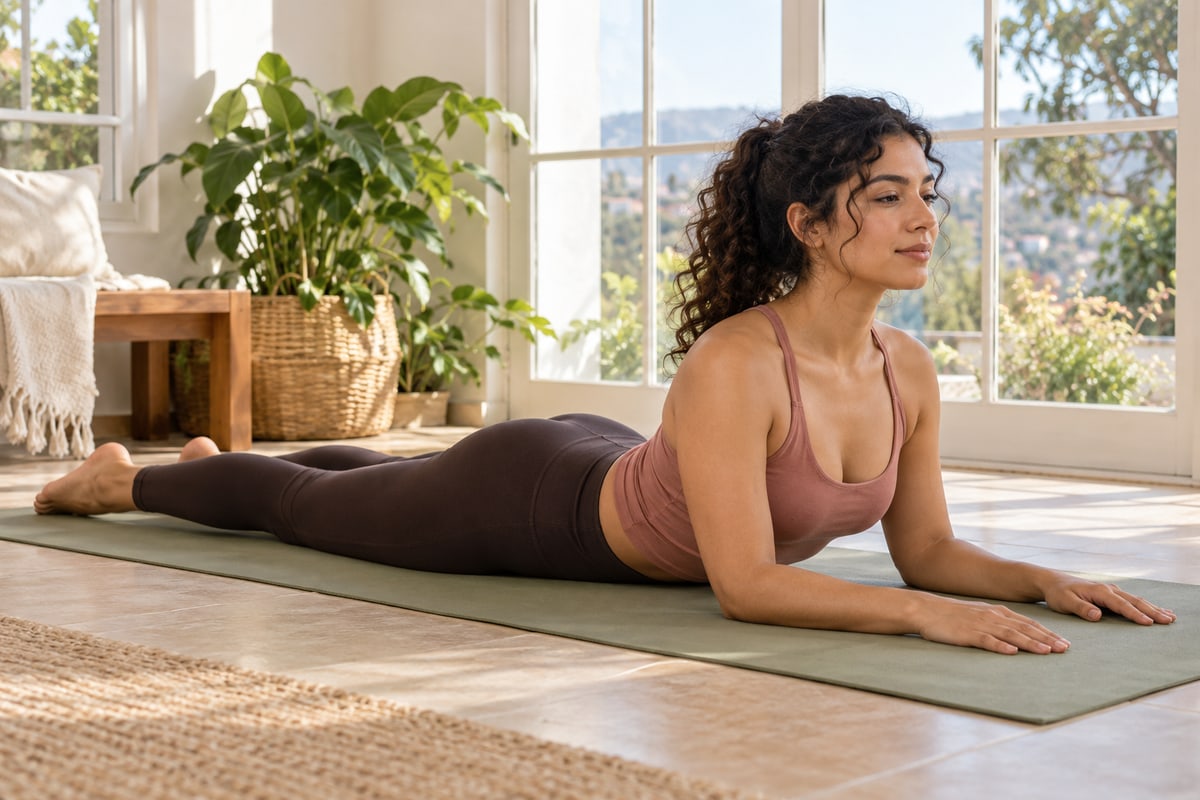
Sphinx and low Cobra can look similar in a photograph, but the support changes. In Sphinx, the forearms stay on the mat. In low Cobra, the palms are near the shoulders and the elbows remain bent while the chest lifts only a little. Neither shape needs to become a competition to arch higher.
This suggested ten-minute home practice explores that difference through short attempts and generous rests. It is for adults who can comfortably lie on their front and get down to and up from the floor. It is not a treatment for back pain or a test of flexibility. If lying on your belly is unsuitable, choose another practice rather than trying to complete this one.
Choose the practice before you start
The NCCIH yoga safety guide recommends suitable instruction and adaptations to individual needs. Ask a qualified instructor or clinician before this practice if you are pregnant, injured, recovering from surgery or managing a condition that affects exercise. New or unexplained symptoms need individual advice. If you are learning these poses for the first time, an instructor can check your setup rather than asking you to copy a photo exactly.
A clear mat and a modest range
Use a non-slip mat on a dry, level floor with room for your whole body and a slow roll onto either side. Keep furniture and loose objects outside that space. You need no strap, blocks or weights. Wear clothing that lets you breathe comfortably. Put a timer where you can hear it without repeatedly twisting your neck.
The TINT asana teaching library describes Sphinx as a forearm-supported variation related to Cobra. The particular low-range choices, durations and sequence here are our editorial suggestions. They have not been tested as a clinical intervention.
The ten-minute clock
Warm-up, rests and position changes are included. The attempt windows are not continuous holds. You may finish earlier, skip either pose or spend its entire window resting.
0:00–2:00 — arrive and warm up
Sit comfortably for the first 30 seconds and make a few easy shoulder rolls. Use the next 30 seconds to turn onto your side, then carefully onto your front. Spend the remaining minute resting with your forehead on comfortably stacked hands if that suits your neck, or choose another comfortable resting position. Breathe normally. Do not force a deep breath against the floor.
2:00–4:00 — short Sphinx attempts
Slide your forearms forward, parallel on the mat, with elbows slightly ahead of the shoulders. Keep the pelvis and legs grounded. Let the chest rise only as far as comfortable, soften the shoulders away from the ears and keep the neck in line rather than tipping the head back. Try about ten seconds, then lower and rest for at least twenty seconds. Repeat only while the setup stays easy. Spend any unused time resting.
4:00–5:00 — release the support
Lower fully and return to your preferred comfortable rest. This minute separates the two setups. Notice whether forearm support was comfortable; there is no requirement to proceed to Cobra. If either the position or breathing feels wrong, stop the practice.
5:00–7:00 — small low Cobra attempts
Place palms near the shoulders, elbows bent and close to the ribs. Keep the pelvis and legs grounded. Explore a small chest lift without driving through the hands to straighten the arms. Keep the gaze slightly ahead and down so the neck stays long. Try about five seconds and lower slowly, followed by at least twenty seconds of rest. Repeat only a few comfortable attempts. If you cannot find an easy small lift, use this window for rest or the comfortable Sphinx option instead.
7:00–9:00 — settle without another backbend
Rest in a comfortable position. You can stay on your front if suitable, or use the time to roll slowly onto your side. There is no need to add a deep forward fold to “cancel out” the previous shape. Keep breathing ordinary and let the timer create space rather than pressure.
9:00–10:00 — leave the floor slowly
Roll onto your side, pause, then use your hands to come up into sitting. Stand only when ready. Take longer if needed; the ten-minute plan is not a reason to rush a transition.
Which one belongs in your next practice?
Keep the option that suits you today, or neither. Forearms may make one setup easier to organise, while palms and bent elbows make a different task. A deeper shape is not automatically more useful. Record which support felt manageable and what you want to ask an instructor; avoid scoring yourself by chest height.
Stop for pain, dizziness, numbness, tingling or feeling unwell. Do not repeatedly change your arm position to work through a symptom. Our transition guide helps you allow time between shapes. Prefer another orientation? Try the seated and reclined practice, or choose chair yoga when floor access is the constraint.
Sources checked 30 October 2026. Photographs depict a fictional AI-generated adult, not a clinician or an individual whose movement has been assessed. This is a general practice suggestion, with no promised health or body-shape outcome.