Articles are currently available in English.
Yoga
Yoga With a Strap: A 10-Minute Reclined Practice
By Sweat & Snack · 2026-10-29
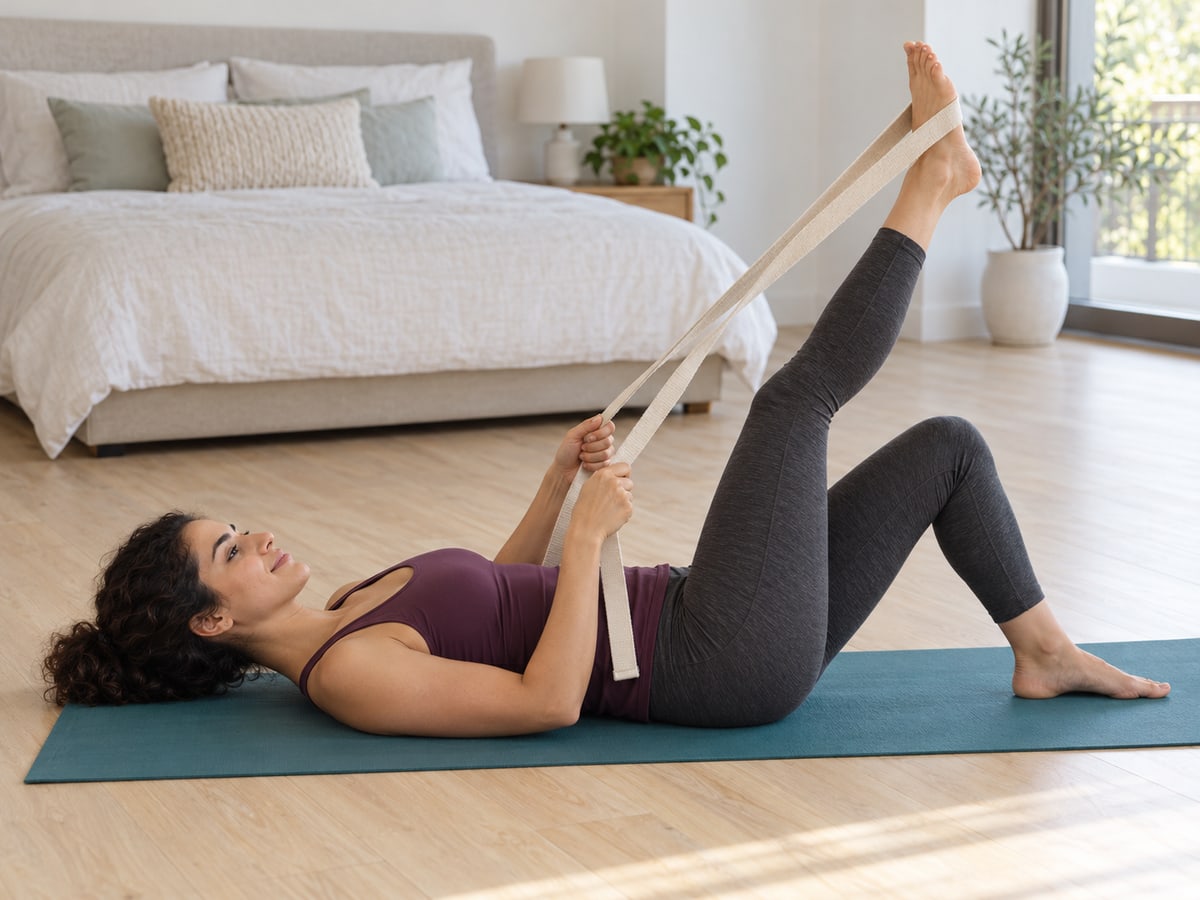
A yoga strap can bridge the distance between your hands and your foot. It does not need to pull your leg towards your face. This suggested ten-minute home practice gives you time to arrange the strap, try a small reclined leg stretch on each side, and release it without rushing. A straight knee or vertical leg is not the target.
It is for adults who can comfortably get down to and up from the floor and have learned a basic reclined stretch. If the movement is unfamiliar, ask a qualified yoga teacher to show you first. The NCCIH yoga safety guidance recommends appropriate instruction and modifications. This is a general practice suggestion, not an injury rehabilitation programme.
Choose a strap and a clear space
Use a sound, nonelastic yoga strap long enough to hold an end in each hand without lifting your head or reaching your shoulders forward. Check it for tears and follow its manufacturer's instructions. This practice uses the strap open, with the middle across the ball of one foot. Do not fasten it tightly around an ankle, tie yourself into a loop, or wind the ends around your wrists.
Put a flat mat on a dry, even floor with room to bend both knees and roll onto your side. Keep the strap away from children and pets. The bed in the photograph is background furniture; it is not an anchor. Wear clothes that allow a comfortable knee bend. Set a timer within hearing distance before beginning.
Learn the position before adding a clock
Lie on your back with both knees bent and feet down. Bring one knee towards you only as far as comfortable. Place the middle of the strap across the ball of that foot and hold the two ends. Lift the foot a little and let the strap extend your reach. Keep the other foot on the mat, your head supported by the floor and your shoulders easy.
Leave a small bend in the raised knee. Choose a low enough leg position that you do not need to tug. The UC Berkeley mindful stretching guide includes a floor hamstring stretch using a strap. It advises mild tension rather than pain and discourages bouncing. Here, the strap is a reach aid; it is not a lever for chasing a larger shape.
If gripping is awkward, lower the leg, bend the knee further or release the strap and rest. A hands-behind-the-thigh option, with the other foot grounded, appears in the NHS post-exercise stretching guide. Choose an option you already know rather than improvising a stronger pull.
The suggested ten-minute practice
The schedule includes warm-up, strap changes, rests and getting up. Brief stretch attempts alternate with releases; a ninety-second block does not mean a ninety-second continuous hold. Breathe normally without holding your breath. Stop early whenever needed.
0:00–2:00: settle and warm up
Start seated comfortably, gently move your shoulders and ankles, then use your hands to lower yourself onto your side and back. With both feet down, make a few small comfortable knee bends and foot slides. Keep movements unhurried. Use the remaining time to settle; do not rush the floor transition to fit in extra repetitions.
2:00–3:00: arrange the first foot
Bring one bent knee towards you and place the open strap across the ball of the foot. Take an end in each hand. Check that your head stays down and you can relax your shoulders. Keep the other knee bent, foot grounded. Use this whole minute for setup and small adjustments, without trying to deepen the stretch.
3:00–4:30: first side, with releases
Try fifteen seconds of a mild, comfortable stretch, then fifteen seconds easing out with the knee bent. Repeat that thirty-second pattern up to three times. Hold the leg lower or skip a repetition if needed. Keep the knee soft and avoid bouncing or pulling harder as the seconds pass.
4:30–5:00: change sides
Lower the foot, release the strap and place both feet down. Move the strap to the other foot only when ready. Thirty seconds is available for this change; take longer and shorten the next block if needed.
5:00–6:30: second side, with releases
Use the same fifteen-second attempt and fifteen-second release pattern up to three times. This side may use a different leg height, knee bend or strap length. Match comfort rather than copying the first side's angle.
6:30–7:00: remove the strap
Lower the leg and take the strap off the foot. Put it beside the mat, clear of your hands and feet. Return both feet to the floor. Do not stand while still attached to the strap.
7:00–9:00: rest without the prop
Rest with knees bent and feet down, or another familiar comfortable position. Let the arms rest. Notice ordinary breathing without requiring a particular feeling or result. This is rest time, not another stretching challenge.
9:00–10:00: finish slowly
Roll onto one side, pause and use your hands to come up to sitting. Stand only when ready. If you need longer, take it; the timer is a guide, not a reason to hurry.
When to change or skip the practice
Stop for pain, tingling, numbness, dizziness or feeling unwell. If you have an injury, a medical condition, are pregnant or have been told to limit stretching, ask an appropriate health professional about individual changes. The NHS guidance specifically notes that these circumstances may require adaptations. Do not use a strap to test a painful area.
Our props guide compares equipment; this article concentrates on open-strap handling, brief attempts and releases in one reclined practice. For a session without this prop, see seated and lying yoga without planks. If floor access is the main constraint, consider the chair-yoga guide instead.
Sources checked 29 October 2026. The sequence and clock are editorial suggestions, not a studied treatment or a promise of flexibility, pain relief or injury prevention. The photographs show a fictional adult generated with AI; they illustrate the subject and do not replace instruction.